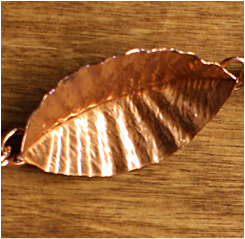
 Fold forming is the process of forging, annealing and unfolding metal to yield distinctive shapes, lines, folds and texture that would otherwise be very difficult to create using traditional metalsmithing techniques. One of the more simple, and yet beautiful application of the fold form process is the forging of metal leaves. Here I demonstrate the technique using simple tools in a project requiring multiple leaf forms to create an artisan necklace. Let's take a moment to review the tools required for basic fold forming:
   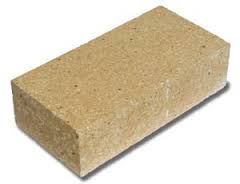 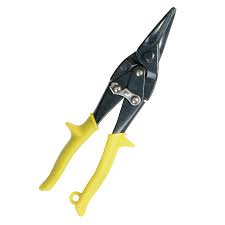 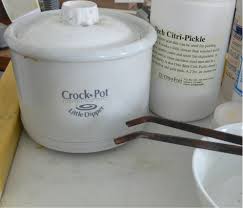 Most non-ferrous metals can be fold formed, including: copper, brass, bronze, sterling silver, fine silver, and gold. My preference leans towards copper. Copper is more malleable and easier to work with than other copper alloys (brass, bronze, sterling silver) and readily takes on beautiful patinas. Let's consider gauge for a moment as well; selecting the appropriate gauge for the desired project is critical in the final success; select too thin of a gauge for the project and you risk structural integrity problems, fold lines breaking; metal tearing and limited forging options where the metal simply becomes too thin from forging to take on the desired final shape. On the other hand, too heavy of a gauge and you won't be able to unfold your forged folds no matter how much annealing and the piece may be too heavy to comfortably wear. In general, I offer the following advice; the larger the project, select a heaver gauge and vice versa; if you are forging earrings, 24-26 gauge is generally better. Necklaces and cuffs work well with 20-22 gauge. 18 gauge and higher should only be used for very large projects using heavy tools. For this project, I am using 22 gauge copper sheet. To begin the project, I take my copper sheet and cut 8 rectangles 2" x 1" using my aviation snips and metal shear. These rectangles get folded in half long wise as seen below. The folded edge is hammered flat. if the metal is too difficult to fold over; anneal the metal first and then fold. Using the aviation snips, I cut one side of the folded copper pieces on a radius, imagining what half a leaf would look like. here's what I ended up with after cutting. Again, if cutting the folded metal is too difficult for your tools, anneal the metal first; it will make the cutting much easier. 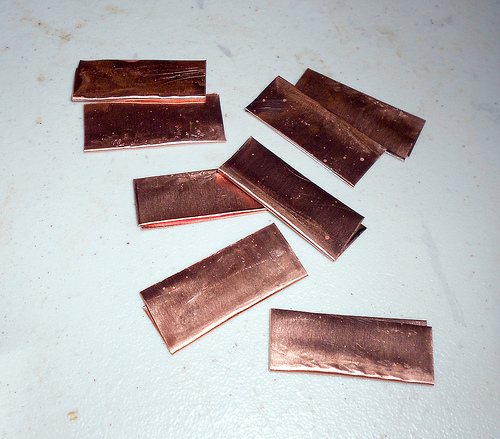 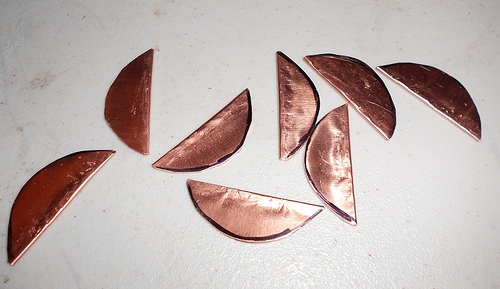 Now I am ready to begin the forging process. One at a time, I anneal the copper shapes with the torch, heating the metal up until a dull red glow appears and my torch flame turns orange. You do not need to heat the metal up to a bright cherry red, you are approaching melting temperatures at that point. Once annealed, quench the metal in water or allow it to air cool before proceeding. I do not advice quenching the hot metal directly into your pickle; the splatter and vapor of sulfuric acid is dangerous. Speaking of dangerous, let's discuss shop safety for a moment. Always wear protective eye wear when ever you are in the studio, especially when cutting and forging metal. And if you insist on quenching hot metal in your pickle solution, wear protective clothing, eye protection and a respirator. You do not want hot acid in your eyes, on your skin, or in your lungs!  Forging the annealed copper forms involves striking one side or the other with a cross peen hammer, depending on the shape you desire. If you desire a boat or pod shape when the form is unfolded, then hammer and forge along the fold side. This will cause the metal to curve inward as it is forged along that edge. The degree of the curvature depends on how much forging and annealing you perform. The metal can only be forged so much at one time before it becomes work hardened and brittle. At this point it must be annealed again before forging can continue. I desire only a gentle curvature to my boat shaped forms, so one forging is sufficient for this project. Here's the forged form: 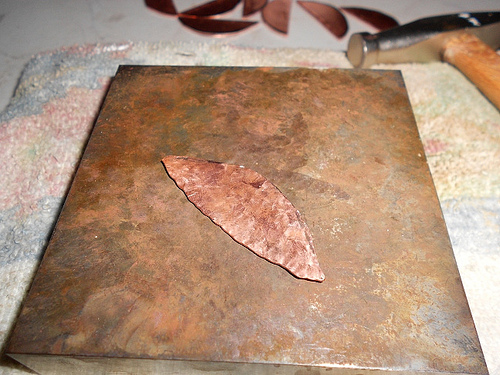 The forged forms must be annealed one final time so they can be unfolded into their final shape. Here I am, annealing the forged form with my torch:  Annealed, the form can be unfolded by carefully prying open the leaves of the fold: 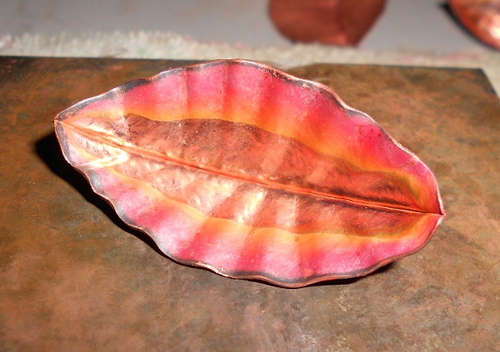 As part of this process, a beautiful forging patina is created inside of the form. This patina can be preserved so long as the remaining work to be performed on the piece only involves cold connections. Any heating of the piece will destroy the forge patina. A clear coat would need to be applied to it as well to prevent further oxidization. The rippled texture is created by crimping the metal with round nose pliers. I will be soldering jump rings onto each of these forms to form my necklace, so the forging patina will be lost. Here I am soldering jump rings onto either end of the fold form elements. I use hard silver solder and a third hand to hold the ring. I prefer to stick solder these on and then quench in water and then pickle in a pickle pot with a piece of iron in it. Iron in the pickle pot will cause the silver solder to become copper plated, hiding it from view. Note that doing this will make it so this pickle can only be used on copper! Do not pickle silver in this solution if you wish it to remain silver! 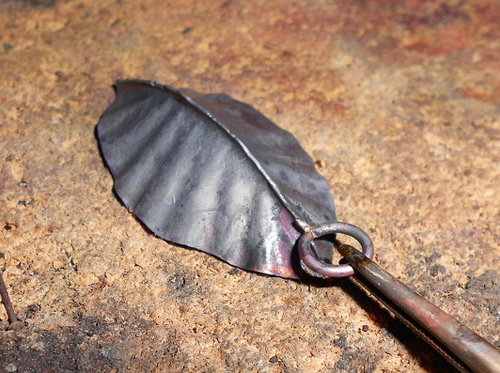 Here are the leave components being assembled into the completed necklace. I double the jump rings on each connection to help the components stay straight. I have also made chain mail extensions to complete the final desired length of the necklace and forged and soldered leaf clasp components. 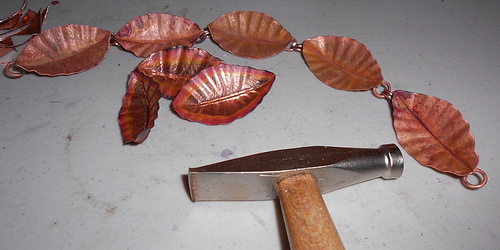 Here's the completed assembly. The metal has been pickled and cleaned. 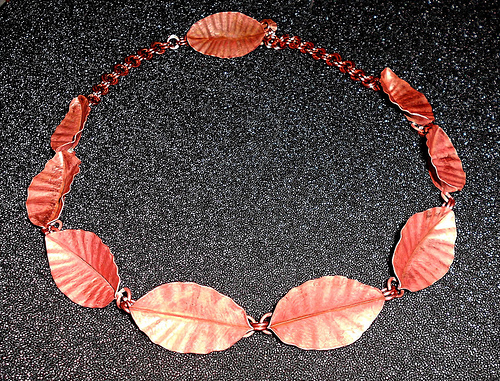 I have chosen a bright polish for the final finish on this piece; this is accomplished by tumbling with steel shot and burnishing compound. This method of polishing ensures that every inch of the necklace is polished and also as the benefit of work hardening all of the components. Here's the finished necklace: 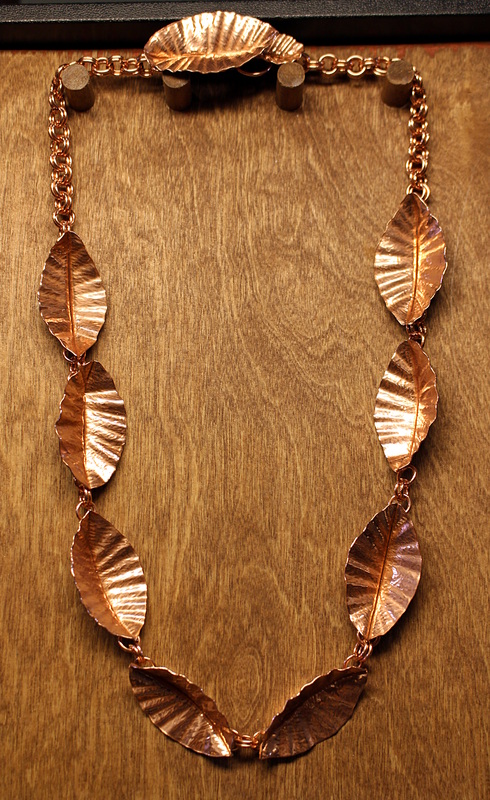 This necklace is SOLD. Want one like it? I would be happy to make you one. I hope you enjoyed this article on fold forming and how I forge my copper jewelry. If you have any questions, please feel free to ask. To learn more about fold form techniques, I suggest purchasing the definitive book on the subject available at: http://www.brainpress.com/Foldforming.html Follow us on Facebook: https://www.facebook.com/dlcgems Shop with us on Etsy: https://www.etsy.com/shop/dlcgems Copyright DLC GEMS LLC 2014
#dlcgems #copper #foldform #copperjewelry #handmade #artisan #ooak #jewelry #tutorial Comments are closed.
|
DLC GemsDLC Gems on Facebook ArticlesForging A Fold Form Leaf Necklace
Autumn Leaves In Copper A Tale of Two Stones How I carve Fire Agate Custom Jewelry for Metal Allergies Seven Stars for Seven Daughters Archives
February 2018
Categories |
 RSS Feed